")


 0
0
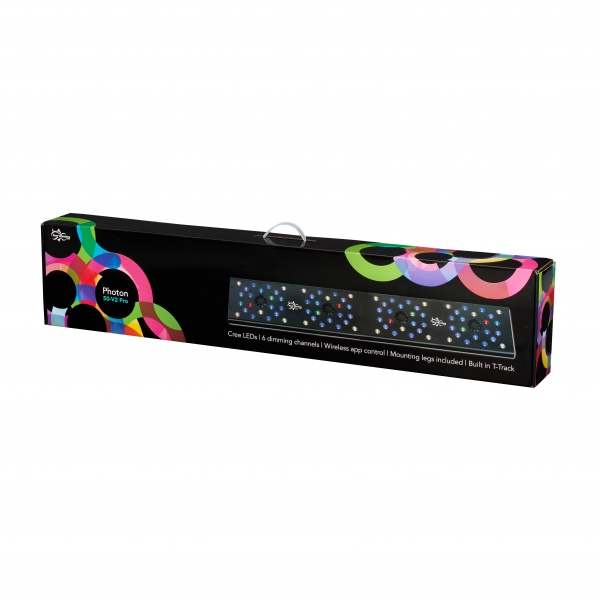
Reefbreeders Photon 50-V2 Pro (e.g., IT5012B)
")
")
")
")
")
")
")
")
")
")
")
")
")
 In stock - Dispatched within 24 hours

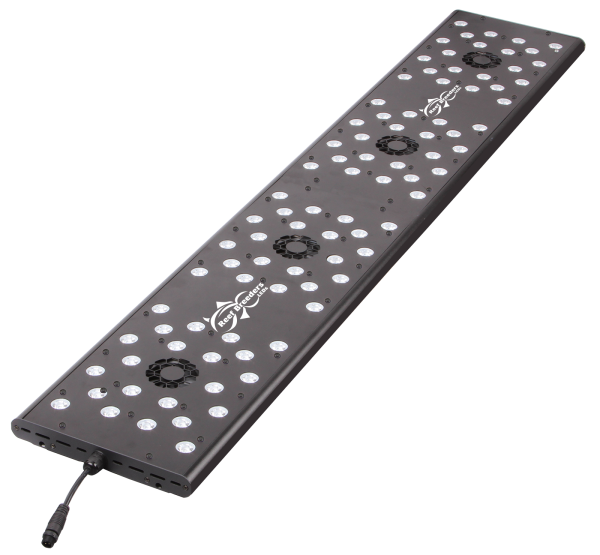
Reefbreeders Photon 50-V2 Pro (formerly: IT5012B)
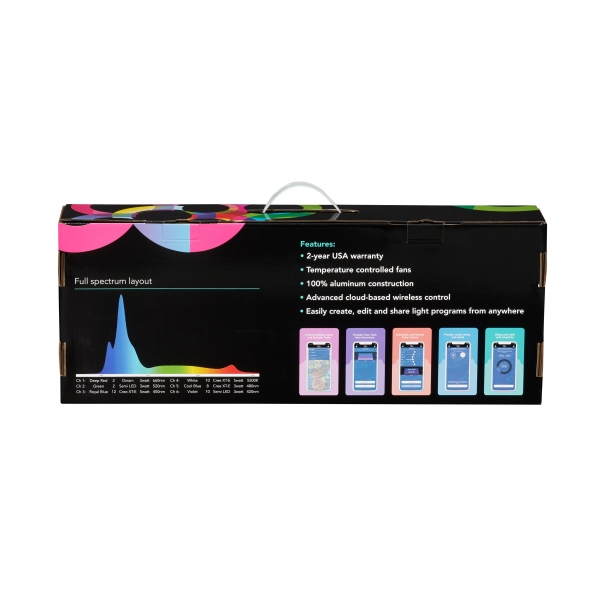
Technical specifications:
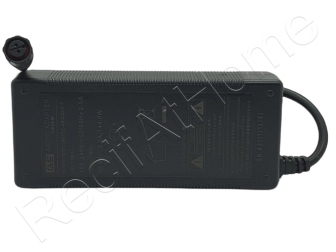
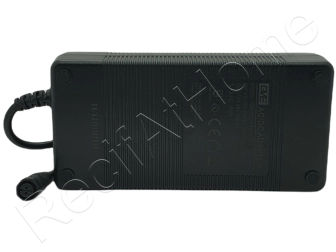
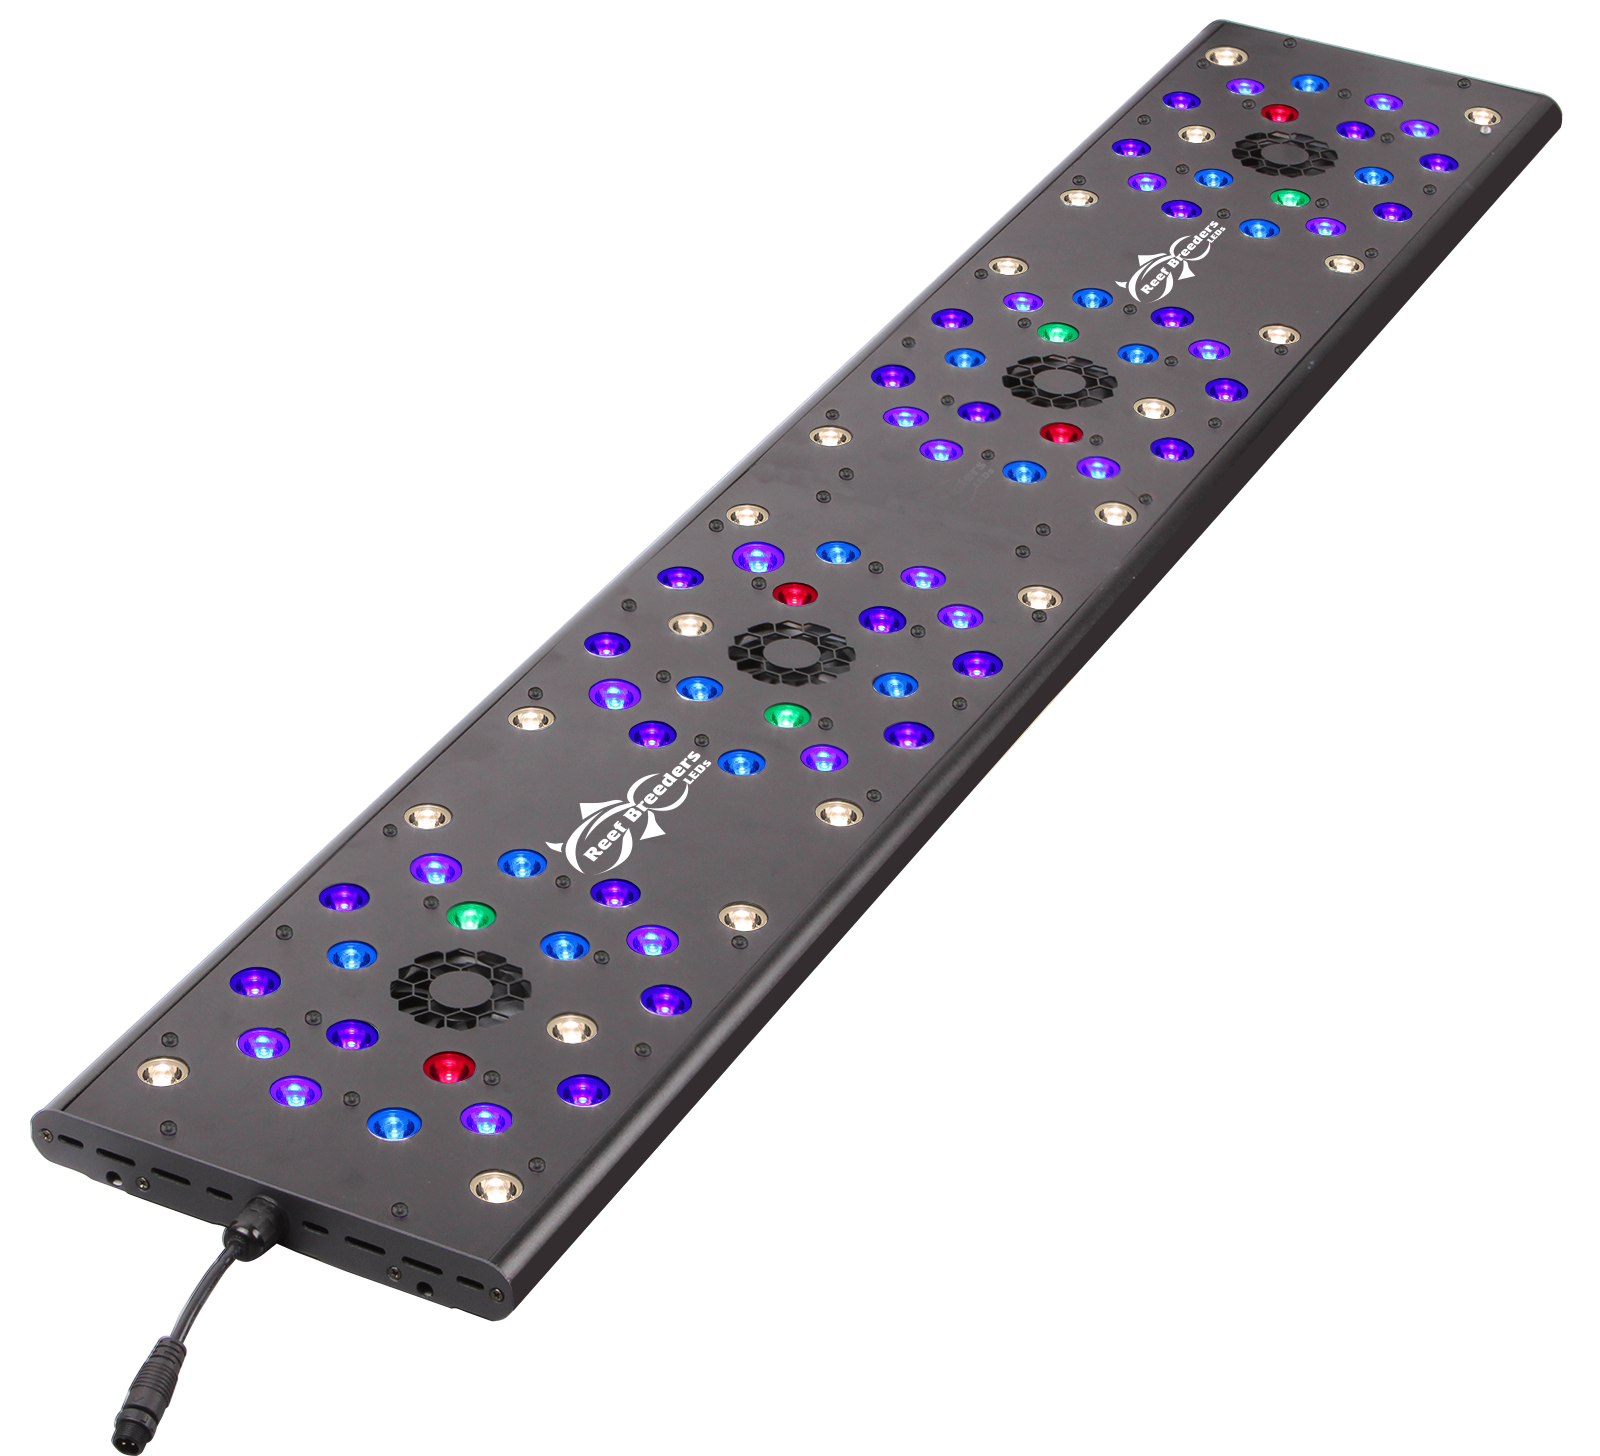
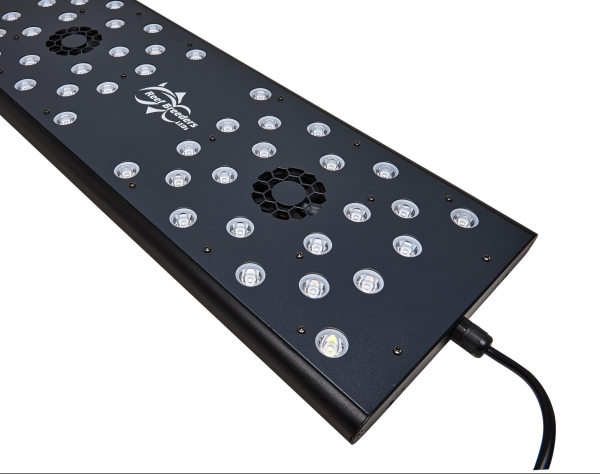
Power 230 watts / dimensions 1200 x 215 x 25 mm thick
Lifespan of 50,000 hours, made of aluminum for better heat dissipation.
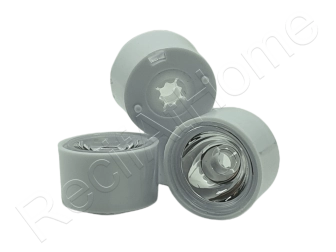
100° Lenses
The Photon V2 Pro uses the highly anticipated Reef Nexus app for superior level control from your smartphone. The Reef Nexus app allows for complete cloud-based wireless control. The Reef Nexus app simplifies programming and lets you choose from a variety of presets and user-created programs, as well as design your own custom program.
The Reef Nexus app adds numerous new control capabilities and is continuously updated with new features. A major upgrade is the extremely smooth gradient ramp. Your light will automatically and gradually increase and decrease, just like a natural sunrise and sunset. There is an integrated 28-day moonlight cycle that automatically increases and decreases the intensity of your moonlights based on the current moon phase.
You can link multiple Photon V2 Pros in the same group of programs or run them separately. This makes it easier to operate multiple Photon V2 Pros.
The Reef Nexus app is entirely cloud-based. After connecting to your home wireless router, you can control your Photon V2 Pro from anywhere in the world as long as you are connected to the internet.
The Photon V2 Pro is also the first product from ReefBreeders that collaborates with the Coral Restoration Foundation™ to help restore the Florida coral reef, the third largest coral reef in the world. Each Photon V2 Pro donates $10 directly to CRF™ on your behalf. You can learn more about ReefBreeders and CRF™ here.
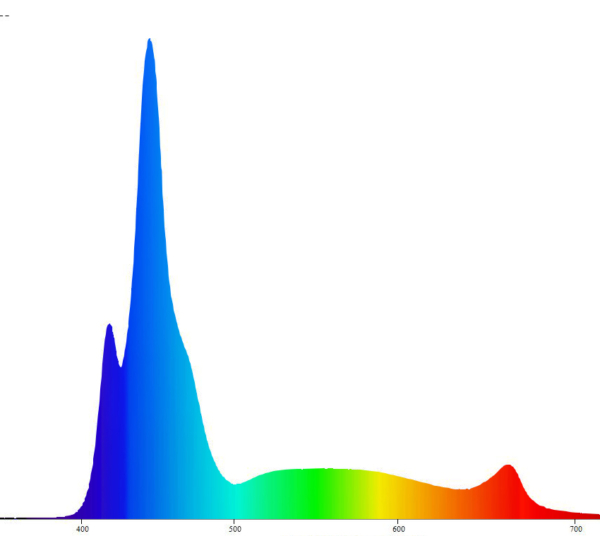
The Photon V2 Pro uses 5-watt Cree XT-E diodes and 3-watt Cree, Semi, and Osram diodes. There are 6 color channels, allowing you to have precise control over each color.
The color arrangement of the Photon V2 Pro is based on years of reef keeping, research, and consultation with renowned experts and enthusiasts on the subject of LED lighting and your corals. We target both chlorophyll and accessory proteins in coral tissues that aid in growth and color. Our configuration is one of the best on the market and has been for years! We have retained the same LED arrangement for the Photon V2 Pros. If you already have an older Photon V2 or V2+, you can easily upgrade to the latest and greatest with our Reef Nexus integration kit.
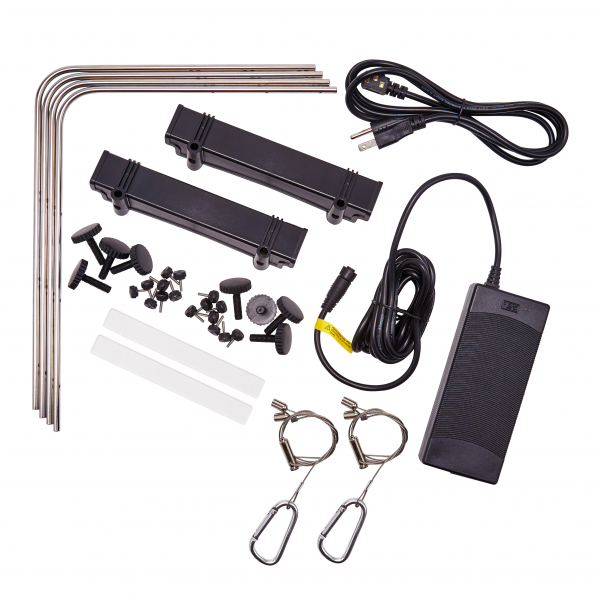
Each light consists of a thin heat sink made of 100% extruded aluminum, robust and designed to last, unlike the plastic housings used by most competitors. Each light includes adjustable tank mounting feet as well as the standard suspension kit. Alternatively, you can use the T-rail on top of the light with your own bolts for almost unlimited mounting configurations. We include everything you need to hang/mount your light—no additional hardware is required for most tanks.
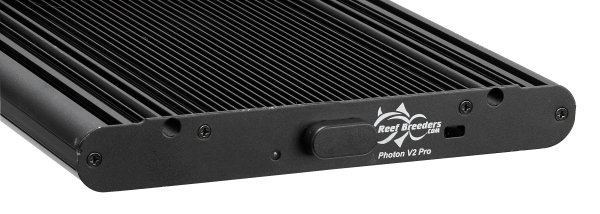
The Photon V2 Pros are cooled by temperature-controlled silent fans. Air moves over the heat sink and never comes into contact with the internal electronics, keeping all components cool and dry.
The new Photon V2 Pro includes a 2.4 GHz wireless chip designed to connect to our Reef Nexus app.
Please note that a wireless router with a 2.4 GHz signal and an Internet connection are required.
The Photon V2 Pro is covered in the United States by our comprehensive 2-year warranty, which includes parts, labor, and shipping for both the entire light fixture and the controller, in both directions. Extended warranties of 3 years and 4 years are also available for purchase.
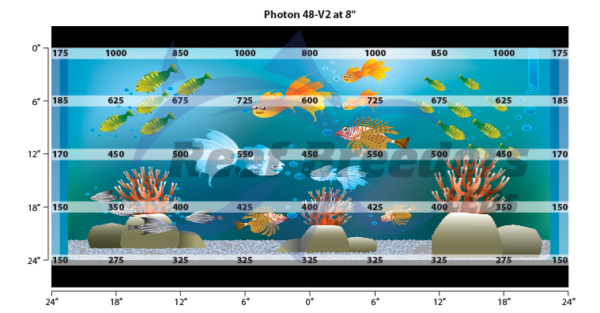
The exact distribution of dimming channels is as follows:
Channel 1 Deep Red 4 Osram 3 watt 660nm
Channel 2 Green 4 Semi LED 3 watt 520 nm
Channel 3 Royal Blue 24 Cree XT-E 5 watt 450nm
Channel 4 White 20 Cree XP-E 5 watt 5500K
Channel 5 Cool Blue 16 Cree XP-E 3 watt 480 nm
Channel 6 Violet 20 Semi LED 3 watt 420 nm

1: Plug your power supply into your lamp, then plug your power supply into the wall, in that order.
2: The light must first initialize by going through each color channel, and the fans will also turn on. The LED indicator at the end of your light will cycle through several colors before settling on blinking blue.
3: Ensure that the Reef Nexus app is downloaded and that the setup and account are connected before attempting to configure the Wi-Fi connection for the lights.
4: In the application, press the + button at the top right next to the equipment to add a new device.
5: Next, press Reef Breeders and select ready.
6: Exit the application and go to your phone's Wi-Fi settings. Find your light "ReefBreeders_XXXX" and connect to its network. You should see a notification inviting you to return to the Reef Nexus app once the connection is established. The LED indicator should be solid blue. If you do not see a notification, exit the Wi-Fi settings and open the Reef Nexus app manually.
7: Once the lamp is connected in the application, you will be prompted to select your 2.4 GHz Wi-Fi network. Enter the password, noting that it is case-sensitive and may contain special characters. You can view your password while typing to ensure it is correct.
8: Once connected, the LED indicator should be solid green, and you will be prompted to name your light. You will then be presented with several color sliders to manually adjust the light. If the light responds to these sliders, it means the connection is successful and your light is connected.
9: The new lights may need to perform an over-the-air (OTA) update after the initial connection. If your light indicator is a solid color, then turns to flashing purple, it is performing an OTA update. Do not unplug your light during the update. This may take about a minute, after which your light will restart and automatically reconnect to your wifi network.
10: Once the OTA update is complete, you can add a schedule to your light. You can choose from presets or user-created programs. We recommend starting with the soft coral program, which peaks at 30% on the blue channels, and gradually progressing to the mixed reef settings over several weeks.
My light is solid blue and won't connect - what should I do? If your light is solid blue, it means it is directly connected to your phone. If you have already connected to your light and haven't connected it to your home network, you will need to enter your phone's Wi-Fi settings. Select the light's Wi-Fi network, then choose "forget this network" to disconnect. Once this is done, it should return to blinking blue. Exit the Reef Nexus app and swipe up to close it (iOS) or remove it (Android). Reopen the app and follow the steps to connect. Only connect to your light's Wi-Fi network when prompted to do so in the app.
I can't connect my lamp to the Internet: Make sure you are connecting to a 2.4 GHz network. Reset your router by unplugging it for 30 seconds and then plugging it back in. Restart your lamp by doing the same. Ensure that the network password entered is correct - they are case-sensitive. Also, be mindful of similar symbols, such as a capital "I" that may look like a lowercase "L".
In some cases, it may also be helpful to restart your phone. As a last resort, you can also consider deleting and redownloading the Reef Nexus app.
My light turns on at the wrong time - how can I fix this problem? If your light seems to be off by a few hours, open the Reef Nexus app and go to the settings. Change the time zone to a random time zone other than your current one, then save it. Go back to the settings, then select the correct time zone and save it again.
My lamp doesn't have a remote control/I installed the Reef Nexus kit and my remote control no longer works with my lamp? This is perfectly normal - the Photon V2 Pro is a smart device and is controlled using an Android or iPhone device. When you install the Reef Nexus kit, you remove the old circuit board that interacts with the remote control.
How do I connect my Photon V2 Pro to an Apex? The Apex VDM integration kit must be installed to do this. The light will not work with the Reef Nexus app while the Apex kit is installed.
Where is the reset button located? Please note that in many cases, a light reset is not necessary. The reset button is accessible via the end cap; it is a small gold button just inside the square cutout illustrated below. The new lights include a small key to press the button. A flat-head screwdriver can also be used. Do not force the button - just enough pressure to make it click is sufficient.
Please note that there are some requirements when you first obtain your Photon V2 Pro or install the Reef Nexus integration kit in your light. A smartphone powered by Android or iOS (iPhone) is required. A 2.4 GHz home or business Wi-Fi network with a password is also required. The vast majority of home routers broadcast either 2.4 GHz, or both 5 GHz and 2.4 GHz. If you have a 5 GHz only network, modify your routing.
Note: There has been no major change in the color of the LED or the lenses between versions B and PRO, only the connectivity has been modified.
It is now a mobile application, so there will be no issue in replicating the settings of a Series B ramp if you wish to add one.
You might also like

Reefbreeders Photon 50-V2 Pro (e.g., IT5012B)