Language:
My Account
0
Aquarium REEF 60 AQUARIUM BLUE MARINE
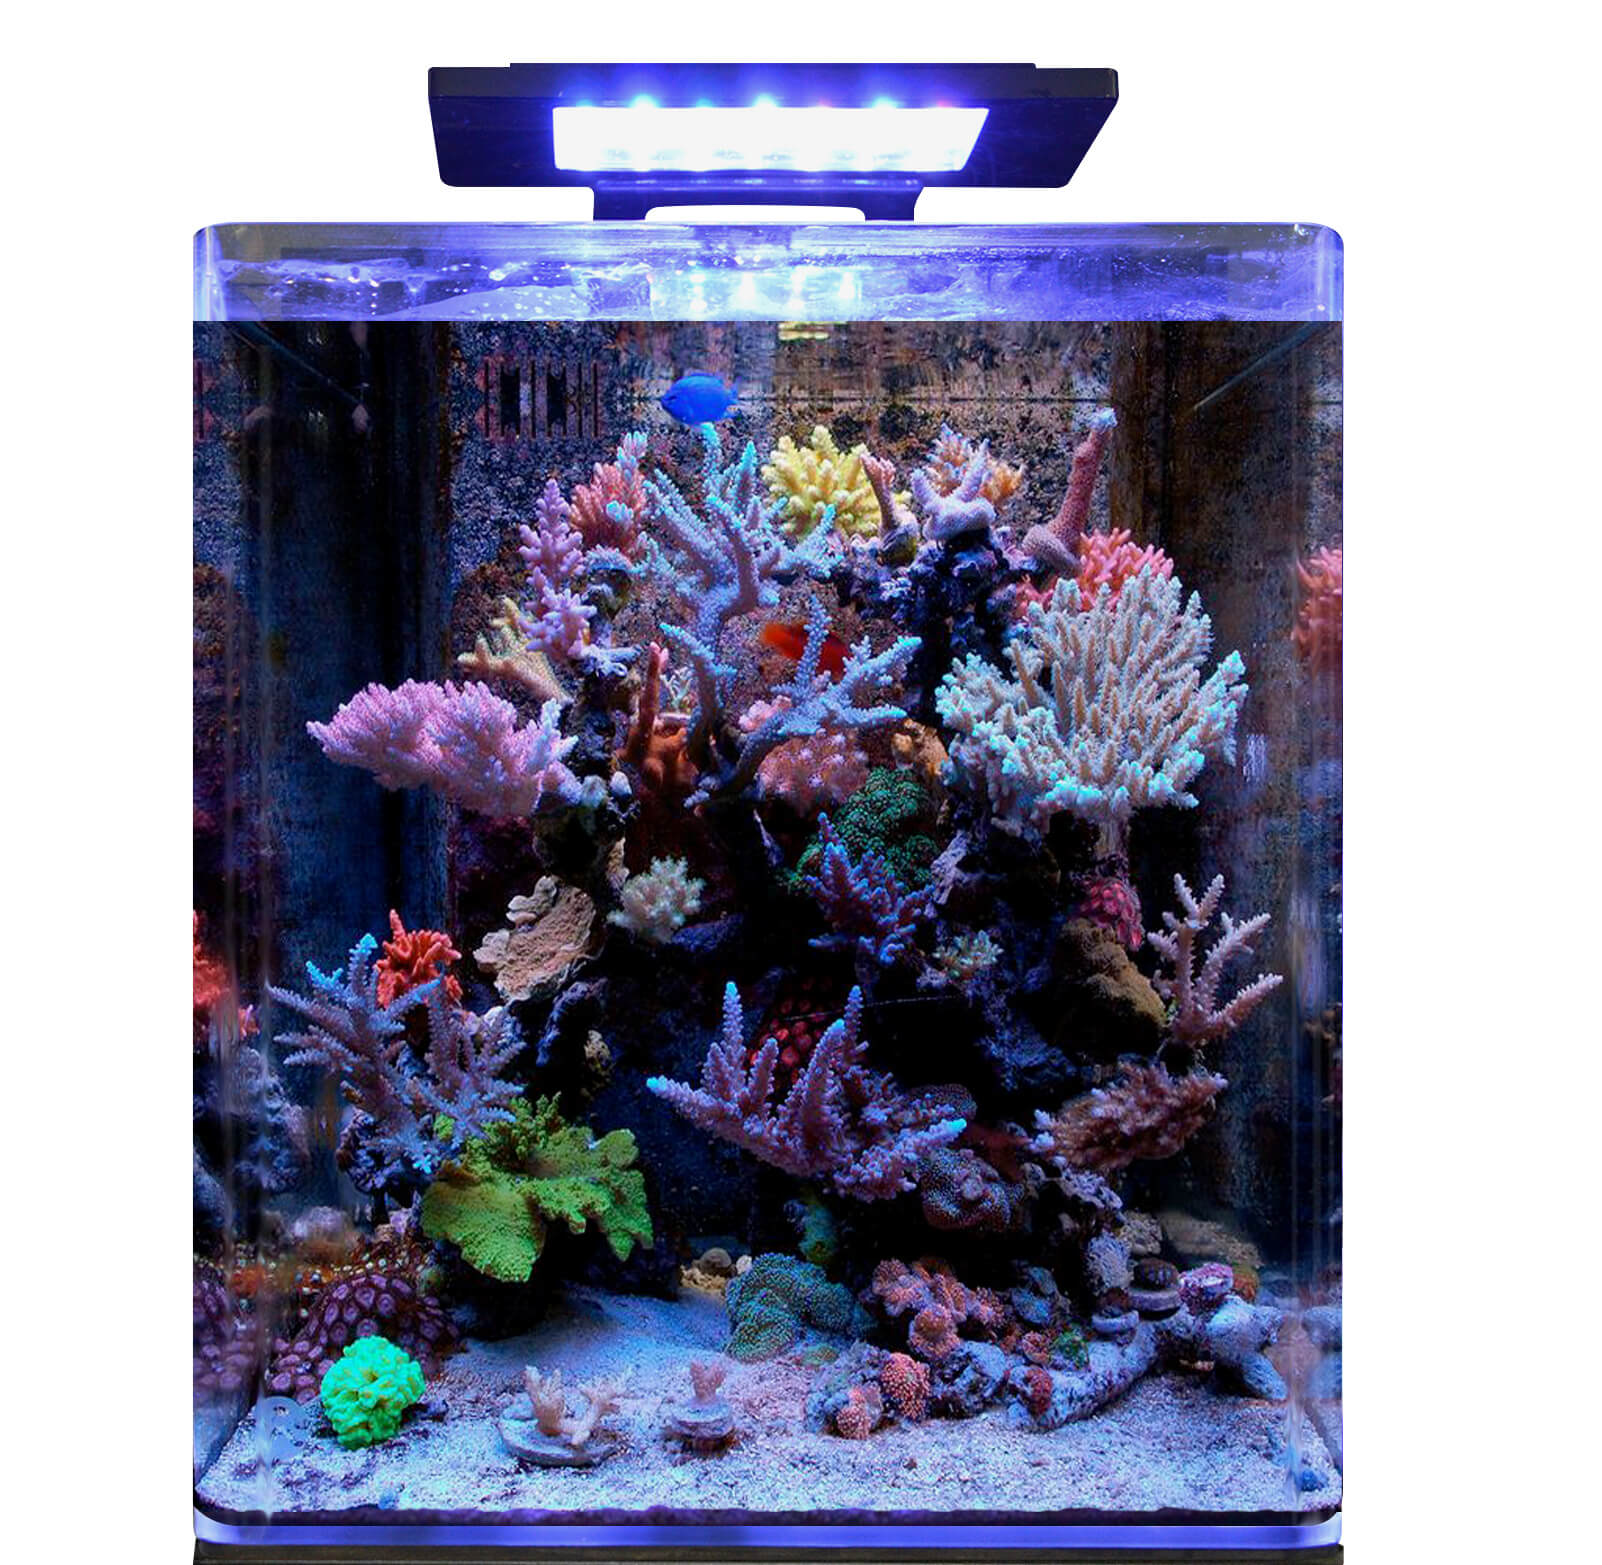
BLUE MARINE REEF 60 AQUARIUM Please add the sheet TRANSPORT ON PALLET to your CART.
In stock - Dispatched within 24 hours
€289.99
En savoir plus
BLUE MARINE REEF 60 AQUARIUM
Attention, the stand is sold separately (see suggestion below)
Transport on a pallet is mandatory for this item to travel in good conditions, no claims will be accepted. Please add the TRANSPORT ON A PALLET to your CART.
Total dimensions of the aquarium 35*45*40 cm or 63 liters
Usable volume dimensions of the aquarium 35*34*40 cm or 47 liters
Dimensions of the rear sump 35*9*40 cm or 12.6 liters
The Reef 60 is a nano aquarium to start your passion. The rear of the aquarium houses a complete filtration system with a circulation pump, a skimmer, and pre-filtration foam. The 11 W LED lighting offers a total light of 12000 K with 4 different colors.
• Integrated rear filter, with pump and skimmer
• Cover for integrated filter Delivered complete with:
• BM Nano LED 11 W Black
• BM Intern Skimmer
• BM Reefpower 600 Pump
Steps available in the user manual pdf below:
Step by step
Install the aquarium (1) on the protective mat (16).
Place the aquarium on a smooth and horizontal surface, ensure that the stand supports the weight and that it is not
sensitive to water splashes, keep electrical outlets away. Understand that the total weight of the aquarium with water, the substrate, and
decorations can reach up to 120 kg. Place the skimmer (Skim 130) in the central part of the filter.
The skimmer can be used with its foam wrapping the
discharge pipe or without the foam with the valve (preferable).
It is advisable to place the pipe in the direction of the water flow.
Screw the nozzle (7) onto the pump (3), thread the hose (10) and install the nozzle connector (8) at its end.
Place the pump (ReefPower 600) in the right section of the filter.
Insert the connector (8) from the inside through the appropriate opening, then install the nozzle (9).
Attach the lighting bracket (4) to the inner glass of the filter and hand-tighten the fixing screws (12) to be able
to adjust its positioning if necessary. Place the cover (17) on the filter. Adjust the position of the lighting so that it fits into the cover openings, then tighten the screws.
Technical installation
Attach the lighting with the fixing screws (13) using the screwdriver (14).
Place the cover clips (11) on the edge of the aquarium and place the glass cover (15) on the clips.
The Reef 60 is now ready for use. Slide the lighting (5) into its bracket (4).
Place the cover clips (11) on the edge of the aquarium and place the glass cover (15) on the clips.
The Reef 60 is now ready for use. Slide the lighting (5) into its bracket (4).
NanoLED Instruction
BLUEMARINE A B
LED Quantity of LED Color Temp./Wavelength
White 14 12000K
Blue 7 450-465nm
Red 4 620-630nm
Green 4 520-535nm
LED Quantity of LED Color Temp./Wavelength
White 14 12000K
Blue 7 450-465nm
Red 4 620-630nm
Green 4 520-535nm
BUTTON FUNCTIONS
Brightness button (A), press to adjust the brightness of the white and blue LEDs in 5 steps.
On/Off switch (B).
On/Off switch (B).
MAINTENANCE
• Regular cleaning with a damp cloth ensures a longer
lifespan and better brightness.
• The LED lighting has a lifespan of at least 30,000 hours of
operation.
• The LEDs cannot be replaced individually, the entire
lighting must be replaced when the LEDs no longer work.
TECHNICAL CHARACTERISTICS
• Power 11 W
• IP64
• Power supply 230-240 V/50 Hz
DIMENSIONS
Lighting:
• 24 x 22 x 1.5 cm
Maximum aquarium size:
• 35 x 35 x 35 cm
24
ReefPower Pump Instructions
INSTALLATION
• Rinse the pump and all parts with clean tap water before installation.
• Install the pump, connect the hose to the pump.
• Plug in the pump, make a drip loop with the cable.
• Install the pump, connect the hose to the pump.
• Plug in the pump, make a drip loop with the cable.
MAINTENANCE
• Lime scale is the enemy of marine aquariums and can affect the operation of the pump.
• Monthly cleaning is necessary to ensure proper functioning.
• Always unplug before any maintenance on the pump and aquarium.
• Open the pump and remove the rotor and ceramic shaft.
• Clean the rotor and shaft in a solution of 50% vinegar and 50% water, let dry for at least 15 minutes.
Check if the rotor spins freely on the shaft. In some cases, it may be necessary to soak longer to remove all lime scale.
• Assemble the pump and place it back in the aquarium.
• The rotor is subject to wear. Depending on usage, it should be replaced annually, this is normal wear and is not covered by the warranty. Replacement rotors are available from your dealer.
TECHNICAL SPECIFICATIONS
• Power 10 W
• Flow rate 600 L/h
• Jet 1.1 m
• Water inlet 19 mm
• Water outlet 9 mm
• Power supply 230-240 V/50 Hz
• Flow rate 600 L/h
• Jet 1.1 m
• Water inlet 19 mm
• Water outlet 9 mm
• Power supply 230-240 V/50 Hz
Skim 130 F Instructions
INSTALLATION
• Place the skimmer in the appropriate filter compartment (see step 2), the hook (A) adjusts the height of the skimmer.
• The appropriate height of the skimmer depends on the level of skimming needed.
• To start, you can adjust the skimmer so that the flow (B) is on or just below the water surface.
• You can adjust the water flow with the valve (C).
• Place the foam collector (D) into the skimmer housing until the two lugs (E) on each side of the bowl rest on the gray rim. It is still possible to adjust the height if necessary.
• With the valve (F), you can adjust the amount of air and control the skimming.
• For optimal skimming, you can adjust the height of the skimmer in the aquarium, the height of the foam collector, the water level in the skimmer, the water flow, and the air intake.
• Plug in your skimmer, make a drip loop with the cable.
MAINTENANCE
• Regularly check and if necessary clean the foam collector with tap water. Do not use detergents that could affect the operation of your skimmer.
• Power supply 230-240 V/50 Hz
You might also like